


Japanese buildings always play a huge role in a Minecraft world since how beautiful they are. With just a little bit of tweaking, you can build yourself a lovely and traditional Japanese house just in a few steps.
And that’s why in this article, we will show you how to build a Minecraft Japanese Temple!
What You Need to Build a Minecraft Japanese Temple
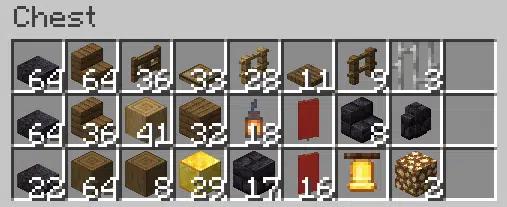
- 150 Polished Blackstone Slab
- 100 Spruce Stairs
- 72 Stripped Spruce Log
- 41 Stripped Oak Log
- 32 Spruce Planks
- 29 Block of Gold
- 17 Polished Blackstone Bricks
- 2 Glowstone
- 8 Polished Blackstone Brick Stairs
- 1 Polished Blackstone Brick Wall
- 36 Spruce Fence Gate
- 33 Oak Trapdoor
- 11 Spruce Trapdoor
- 28 Oak Fence
- 9 Spruce Fence
- 8 Stone Bricks
- 3 Iron Bars
- 18 Lantern
- 17 Red Banner
- 1 Bell
How to Build a Japanese Temple in Minecraft
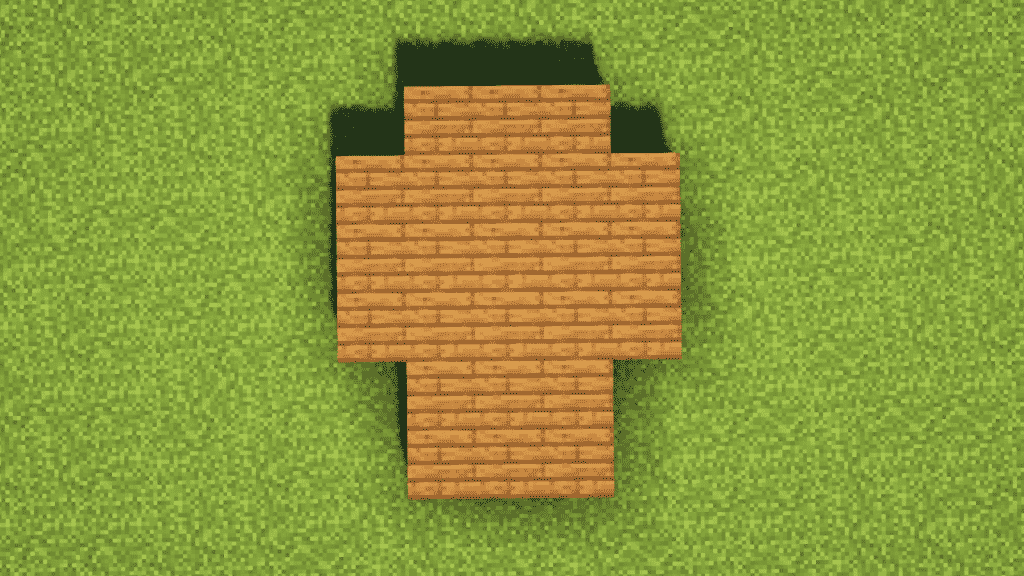
Step 1: Build the Base and Wall
The first thing you want to do is dig an area on the ground and fill it with Spruce Planks. In this build, we will dig a special shape just like a keyhole like this.
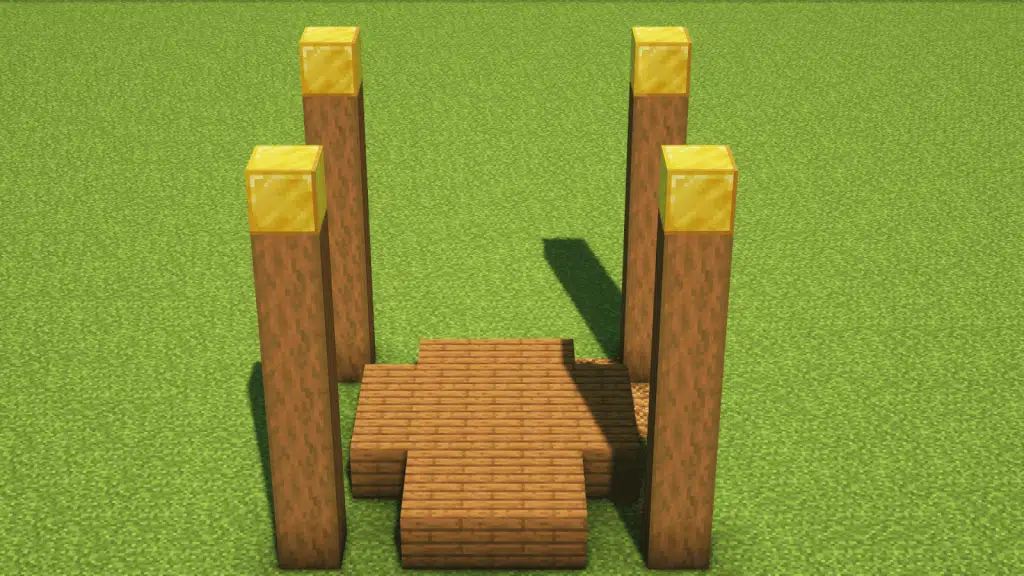
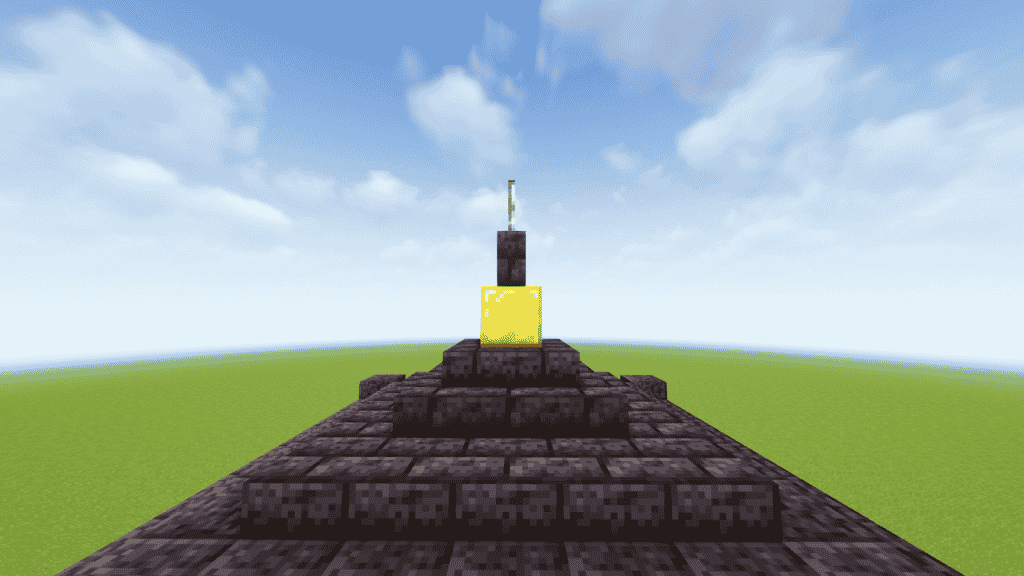
At every cross-corner, place Stripped Spruce Log high up to 6 blocks and put a shiny Gold Block on top of the log pillar. Do the same for 4 corners.
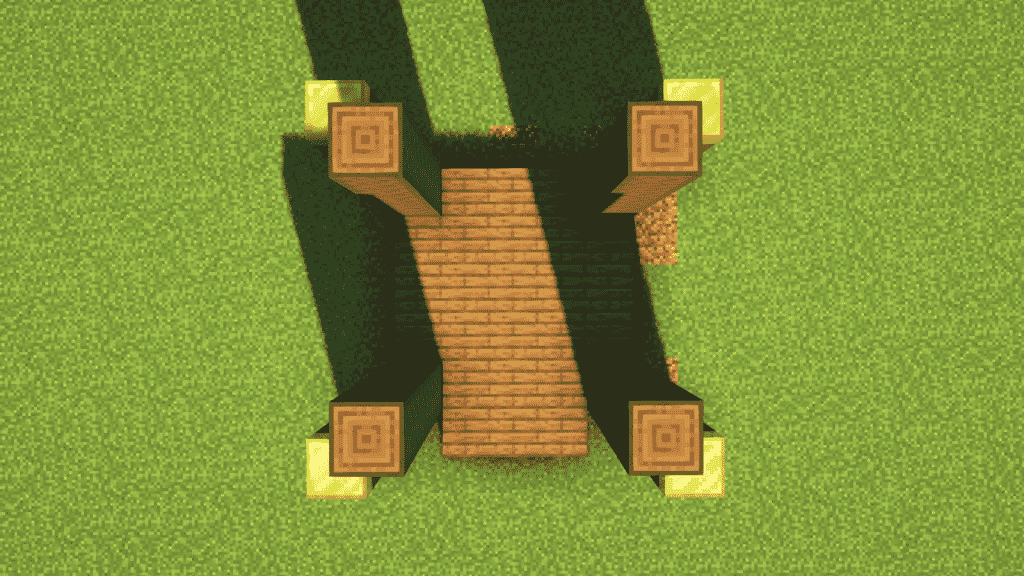
In the inner corners, use the Stripped Spruce Log again and place them high up to 12 blocks. You will see something like this.
Next, connect the 8 pillars with Stripped Oak Log. You should end up spending 32 Stripped Oak Logs after this step.
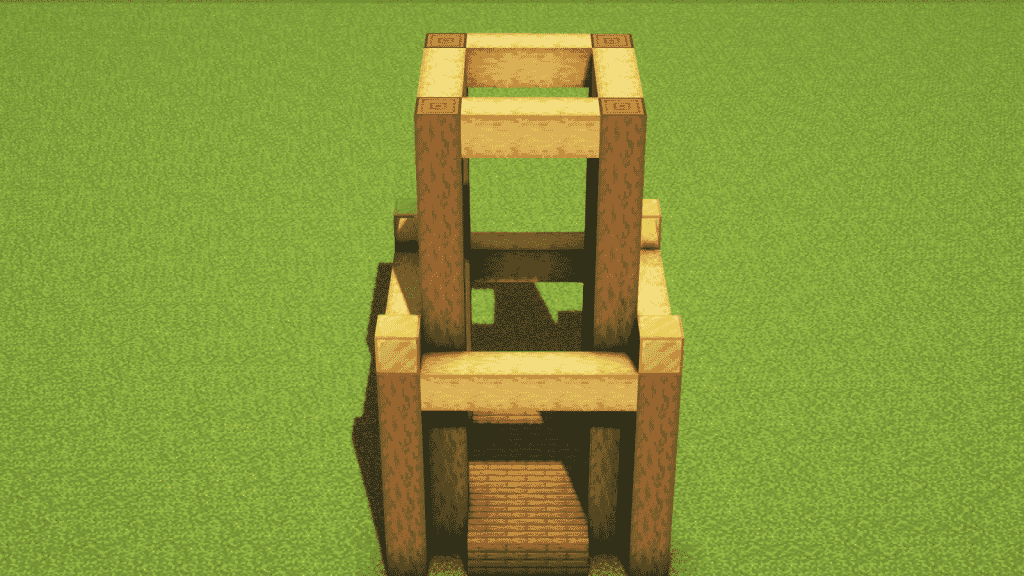
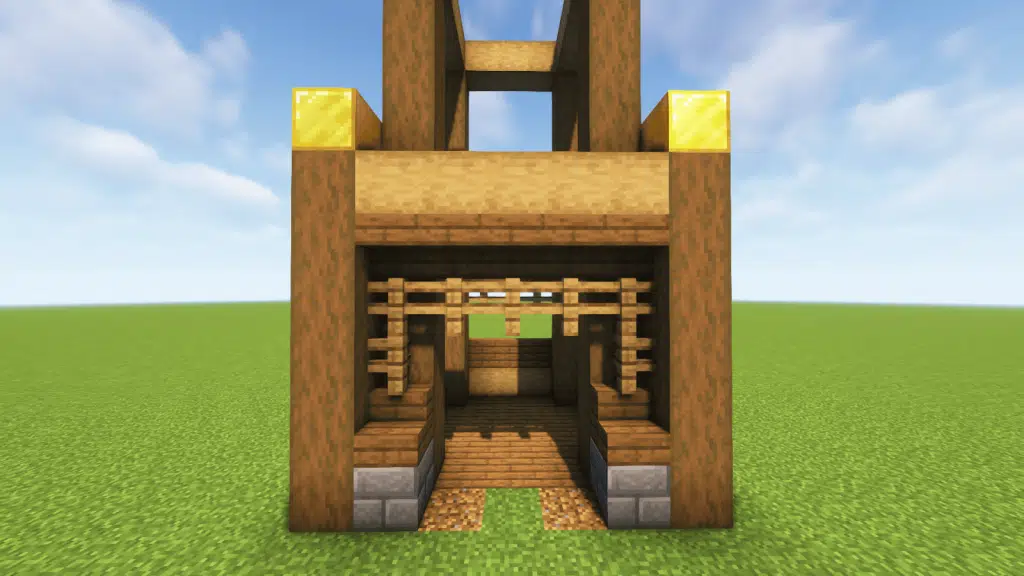
Place Stone Bricks on each side of the lower pillars, then connect them with yet another wall of Stripped Oak Log. Remember to leave the front open like the image below.
Step 2: Decorate the Wall
Next, create a depth by adding frames using Spruce Stairs. You must place them both normal and upside down. For the front door, place 5 Spruce Stairs upside down on top and 2 more on the Stone Bricks.
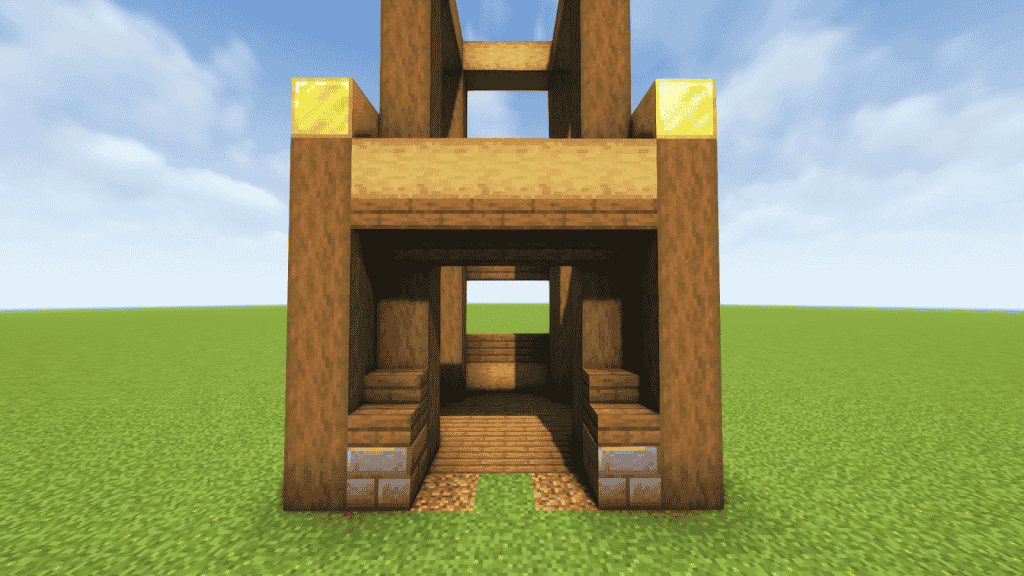
For the three remaining sides, place a total of 10 Spruce Stairs to create this nice effect on the wall.
Then add 7 Oak Fence on all four walls. With 5 fences on the top row and two on the bottom. You should have something like this.
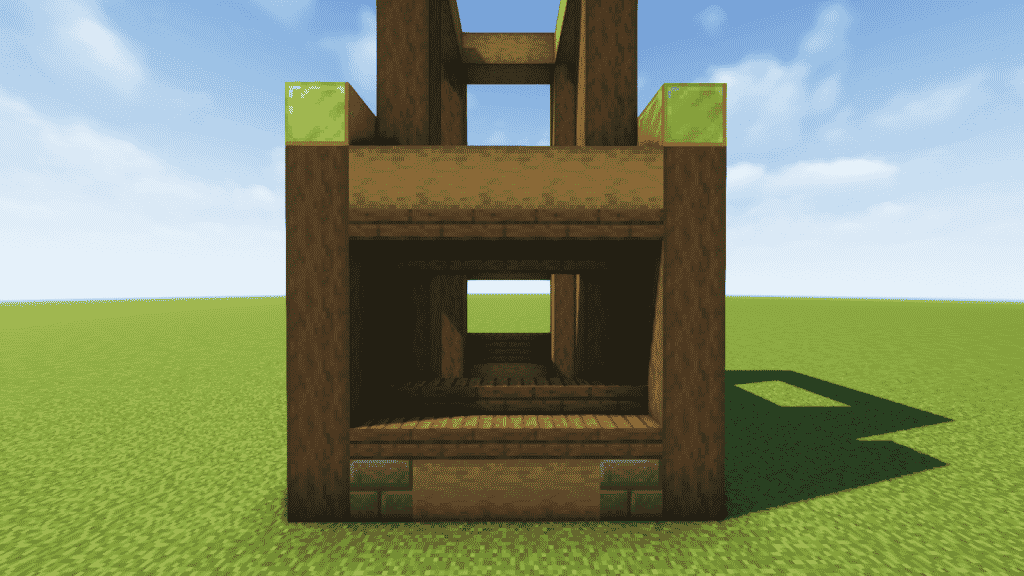
Now go to the second floor, and create a frame using Spruce Stairs just like the first floor.
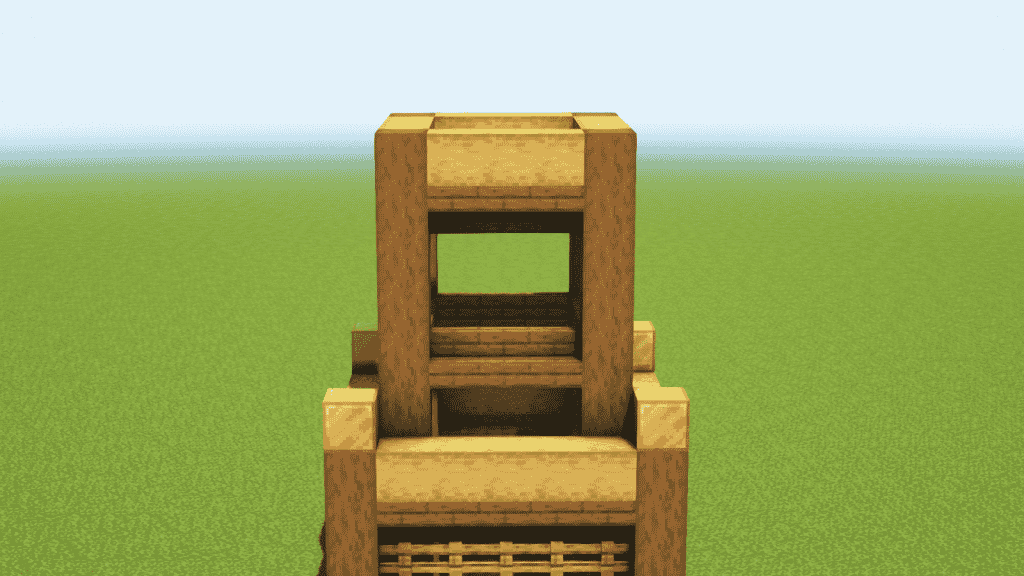
Then add 6 Oak Trapdoor on all sides of the second wall. After this, you’re pretty much done with the wall. Let’s learn how to build the roof of the Japanese temple in Minecraft!
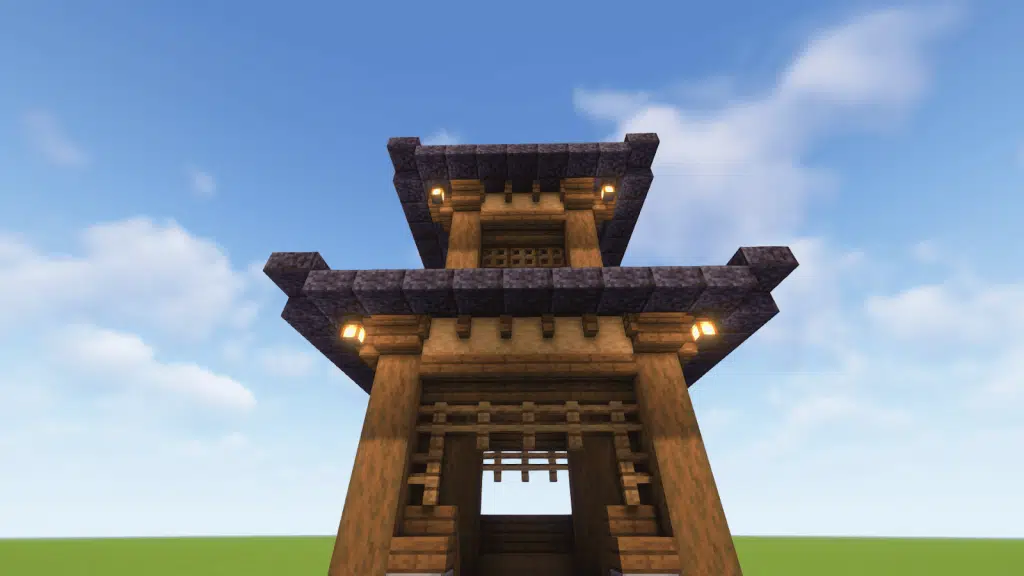
Step 3: Build the Roof
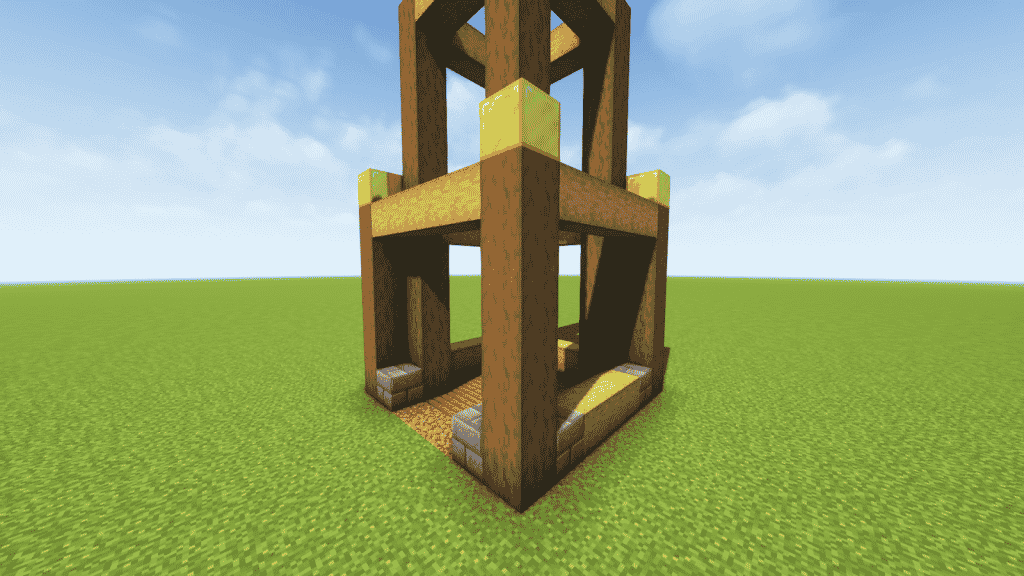
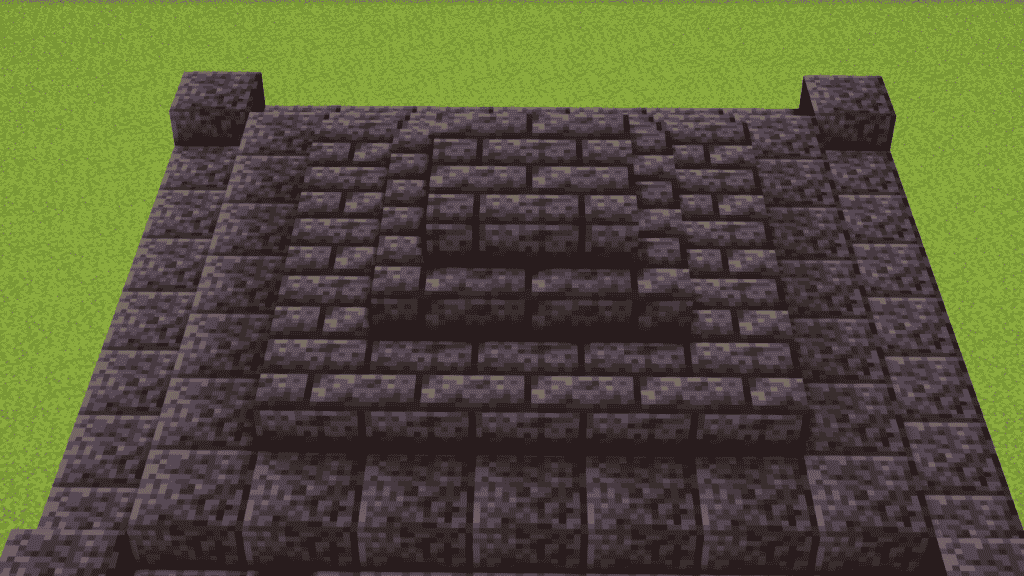
Come to the short pillars, place 2 Spruce Stairs on each side of them to make the support for the Japanese roof.
For more stability, add 5 more Spruce Fence Gate in between two Spruce Stairs and right-click them to open. Remember to do it for all 4 sides and you will have something like this.
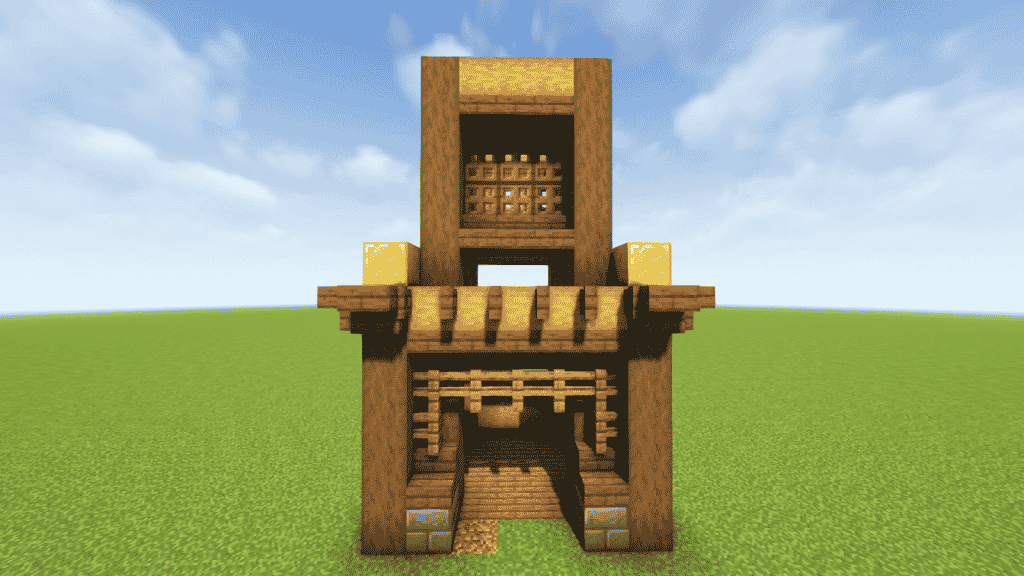
Next just do the same for the higher pillars, Spruce Stairs, and Spruce Fence Gate to go!
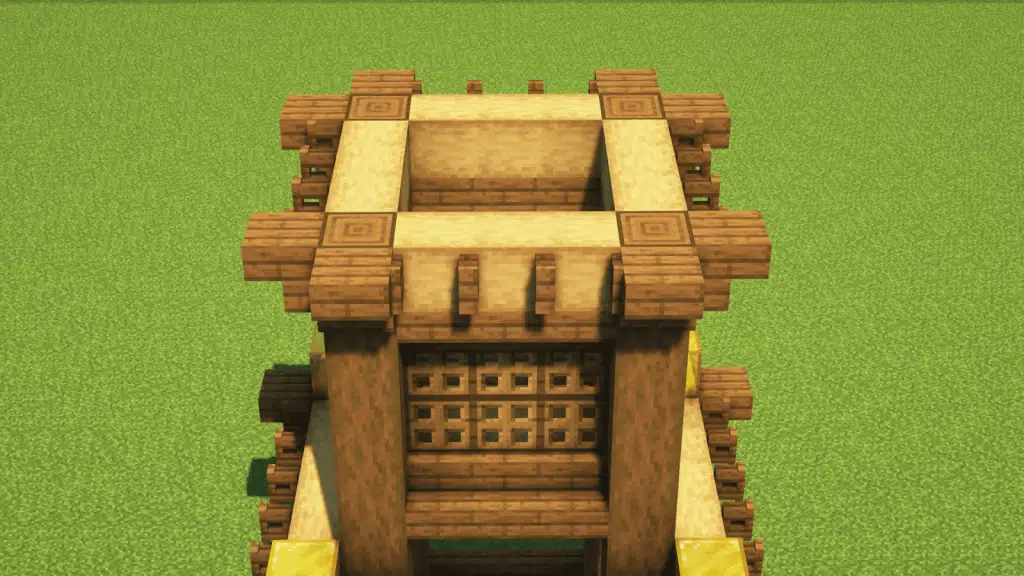
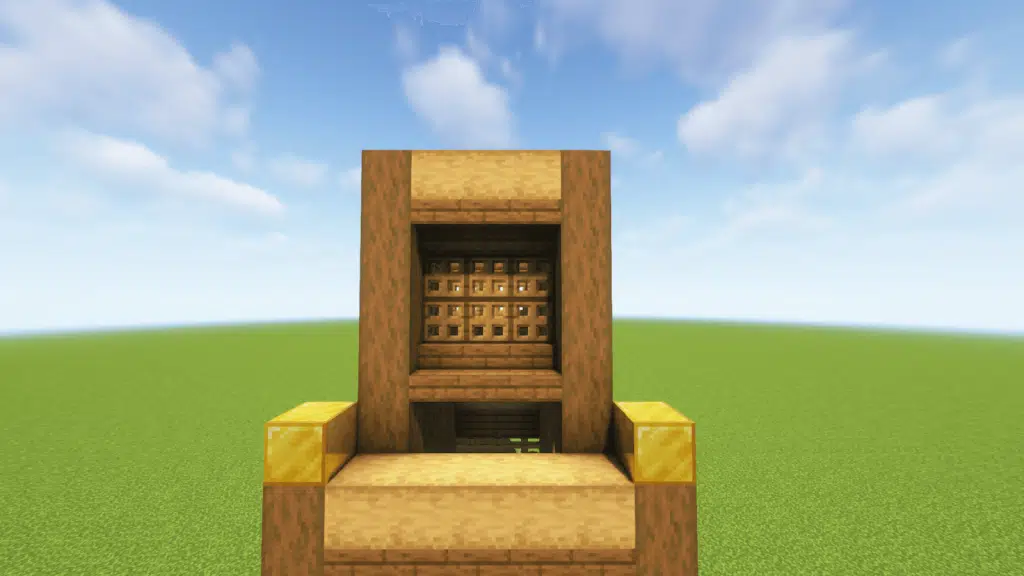
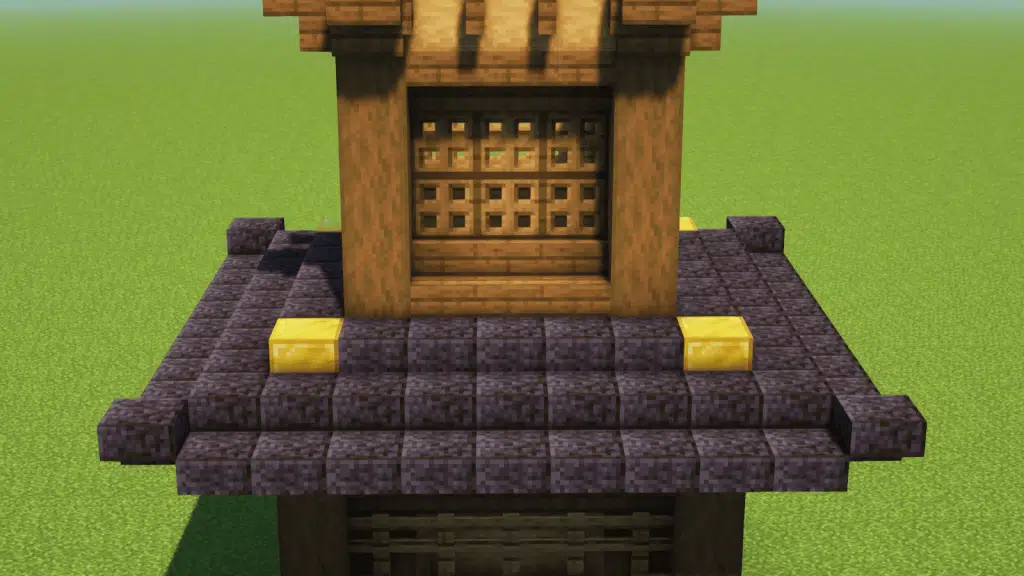
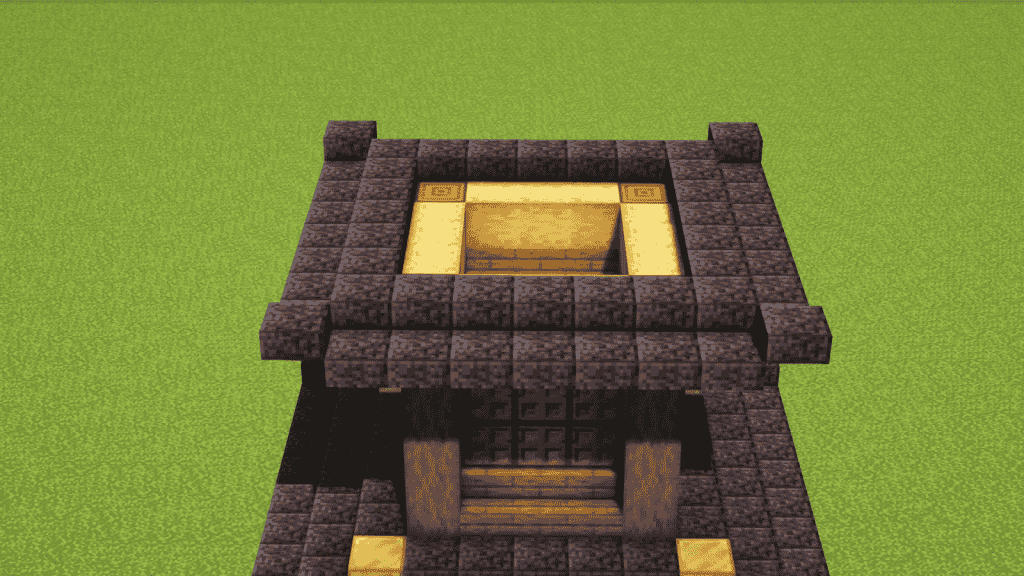
On the first floor again, use Polished Blackstone Slab to create a dark trim around the building. The slab should be located at the same height as the pillars and lower than the Gold Blocks one. Then, bring the four corners of the black trim one block higher.
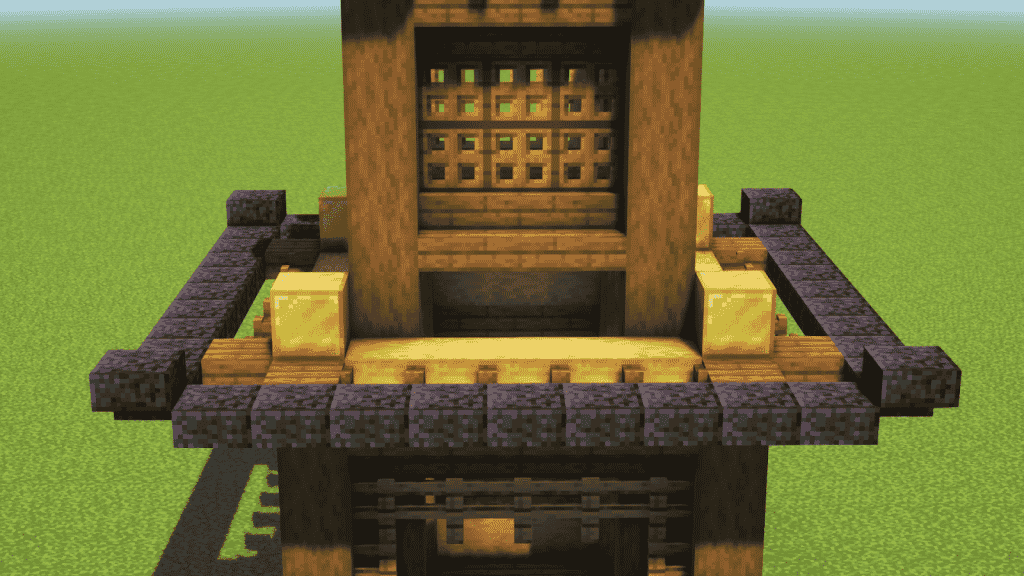
Then just fill the inside with more Polished Blackstone Slab. Remember each block in the inner trim will be half a block higher than the outer.
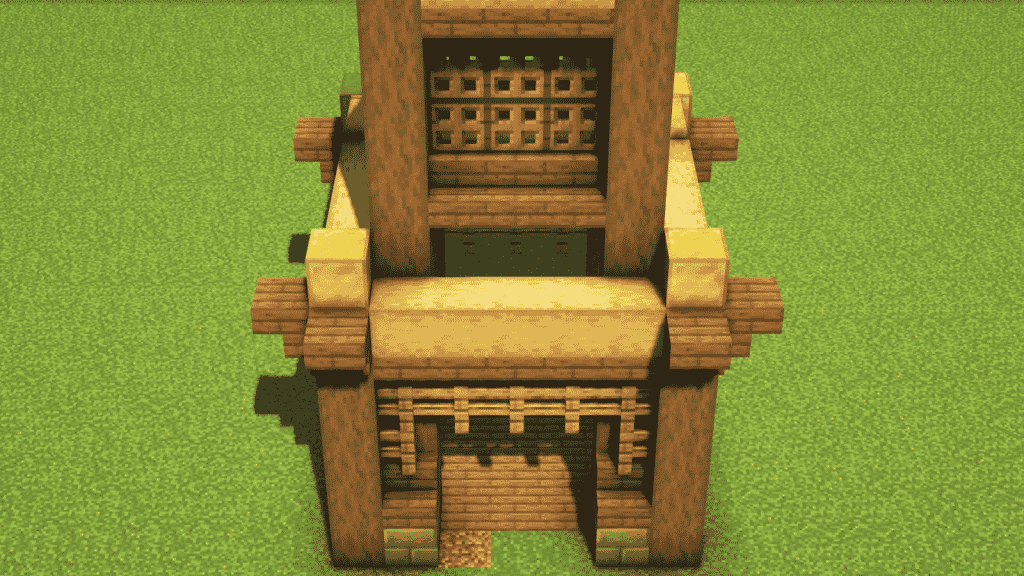
Just repeat the same steps for the second roof. You will have something like this.
For the third trim, use Polished Blackstone Bricks to wrap them around like this.
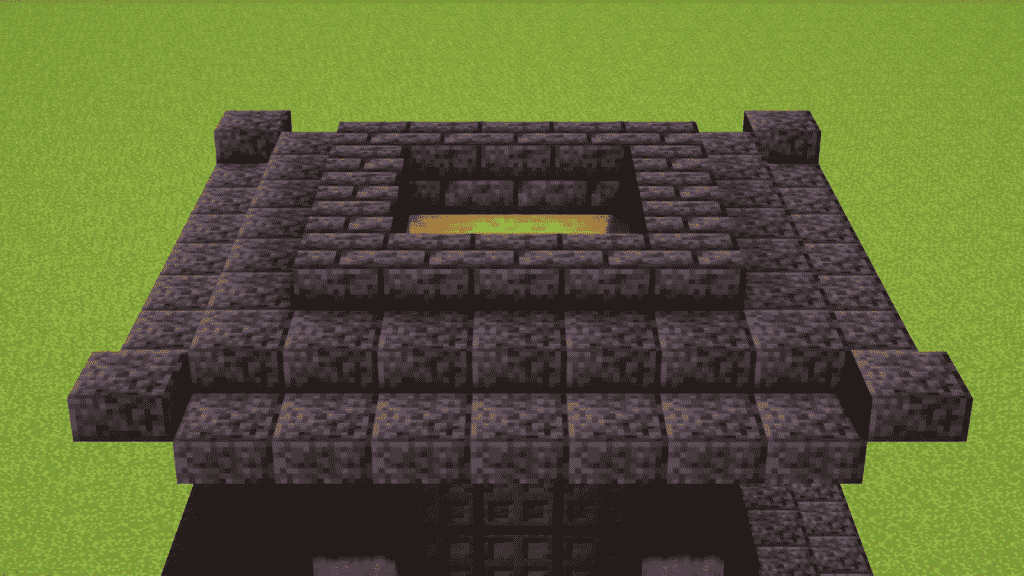
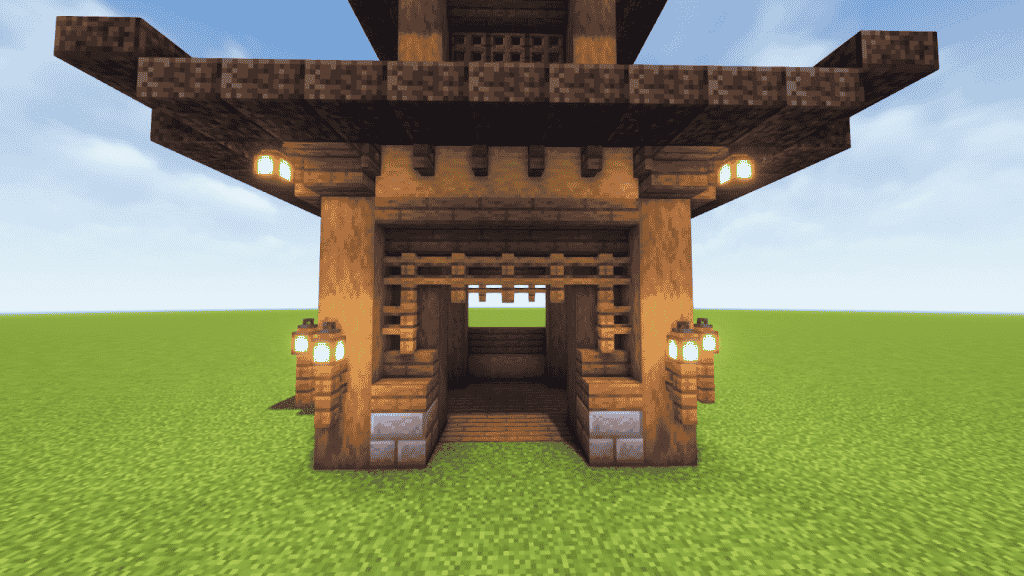
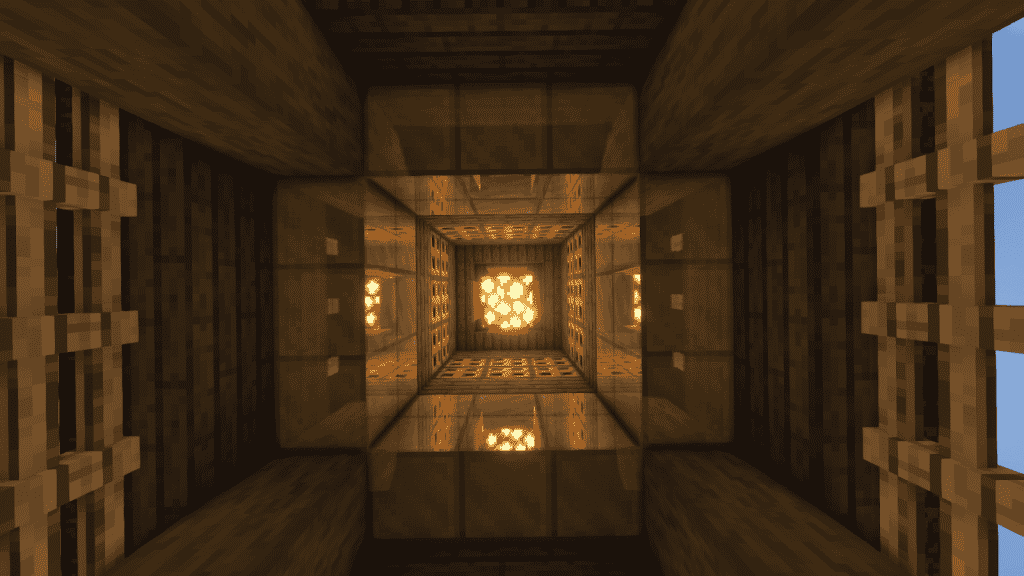
At the Y-level of the Stripped Oak Log, build a platform out of Spruce Stairs but make them upside down. When you’re inside, you should see something like this when you look up.

Then fill the empty space with 9 Spruce Planks.
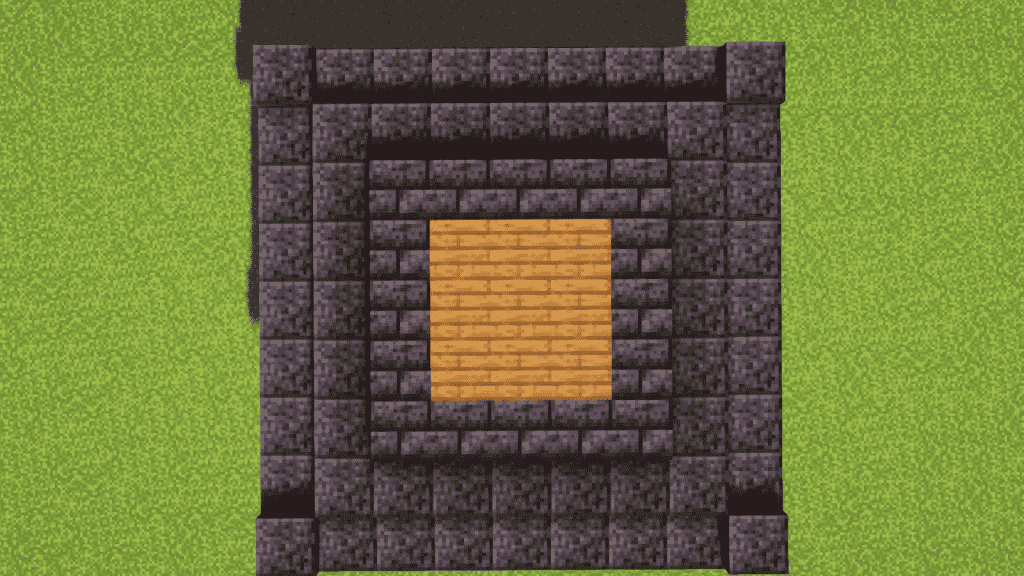
Next, cover that up with some more Polished Blackstone Brick Stairs, and place 1 Polished Blackstone Bricks in the middle. The roof is almost complete!
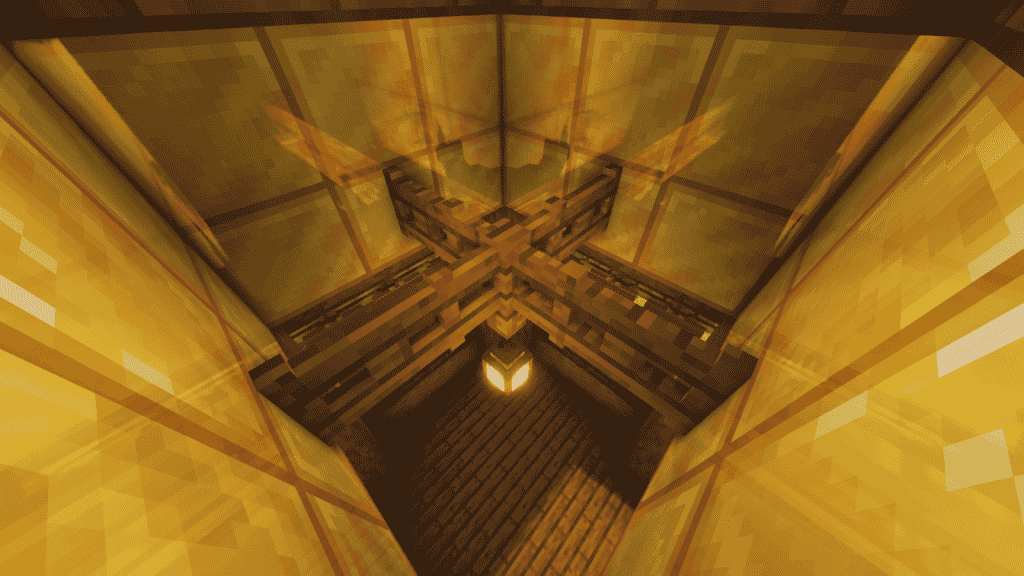
Finally, use 1 Block of Gold, an Iron Bar, and a Polished Blackstone Brick Wall to decorate the roof like this.
Step 4: Build the Interior
You’ve finished the exterior of the Minecraft Japanese Temple. Now let’s decorate the inside of it! Use 8 Lanterns and add them to the empty space of each corner. There are 4 more in the back!
Let’s add some more lighting to the build by placing 2 Spruce Fence and 2 Lanterns on each side of the lower pillars.
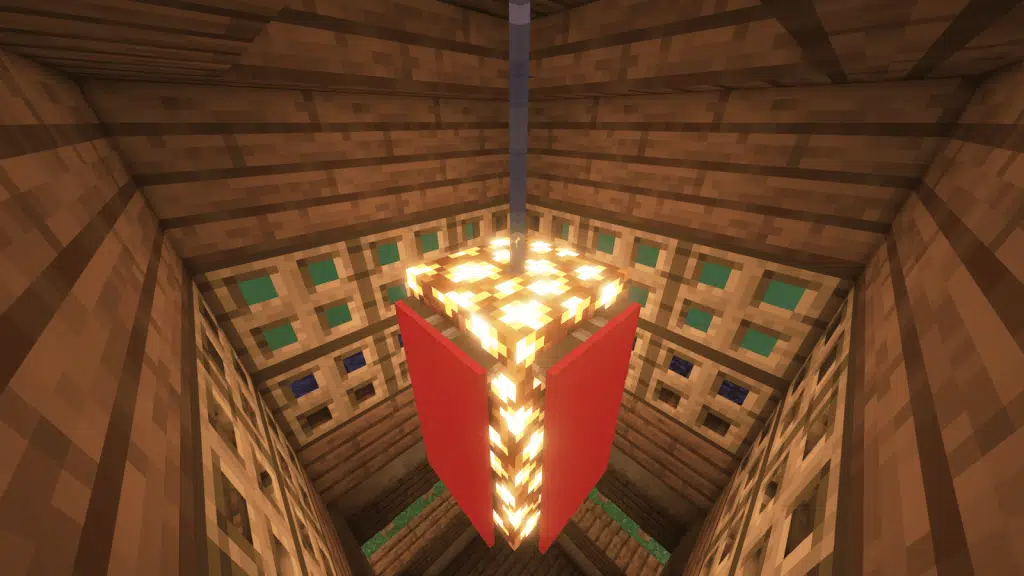
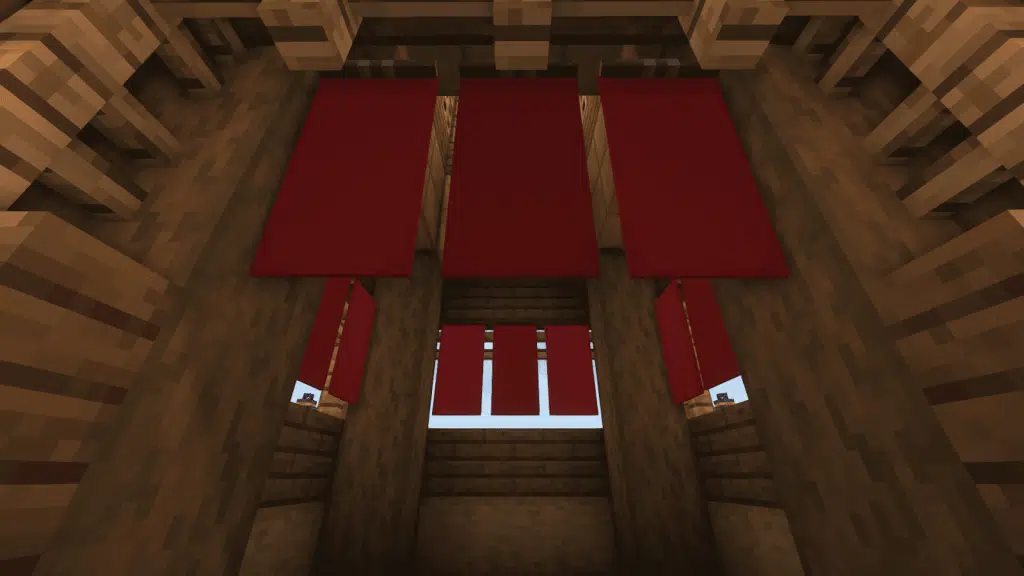
Go inside the temple and climb to the very top, then place 2 Iron Bars from the ceiling and hang 2 Glowstone blocks. Then just cover it with 4 Red Banner.
Add a two-block tall golden wall. You can use literally any blocks in here so just be creative.
Back to the bottom, place 3 Red Banner on each side of the wall like this. The Red Banner should be hung on the Oak Fence.
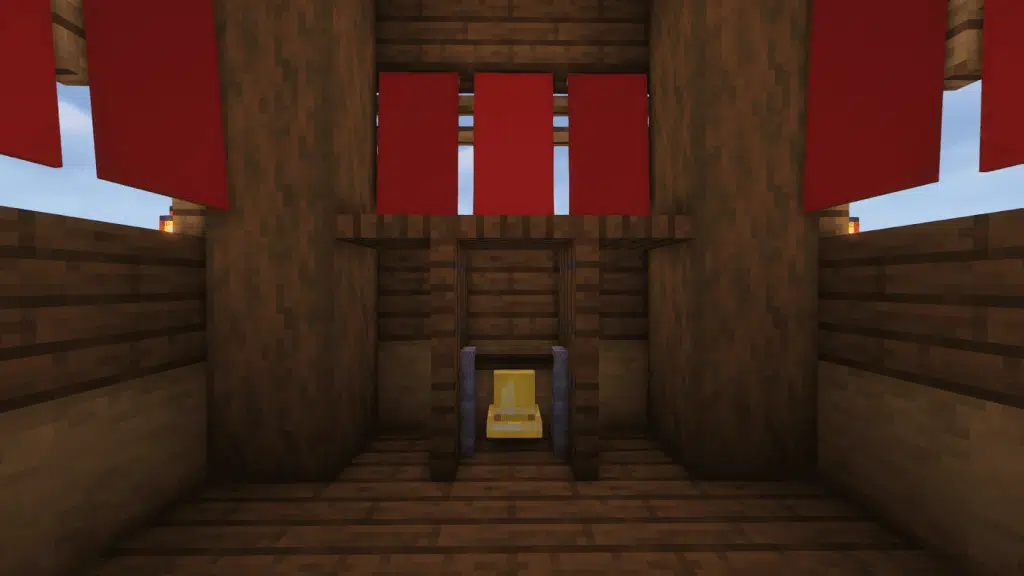
Then use 4 Spruce Fence Gate and 1 Spruce Fence to create a support beam like the image below, and hang the final lantern below it.
Finally, let’s add a sacred bell to the Japanese temple and cover it with Spruce Trapdoors.
And that’s it! Congratulation on your Minecraft Japanese Temple!
 33: Date, Teams, and More")


